LandScape+ application workflow
Overview
The web-based LandScape+ application will guide you through the process of uploading soil geochemistry samples, creating a landscape model for these samples, and reviewing the outputs. Once the model is run, you can download the outputs as a Data Package at any time for the duration of your licence (1 year from licence activation). The online User Interface is designed to make review of the outputs as easy as possible. Once a model is run, any actions in the User Interface will not change the Data Package.
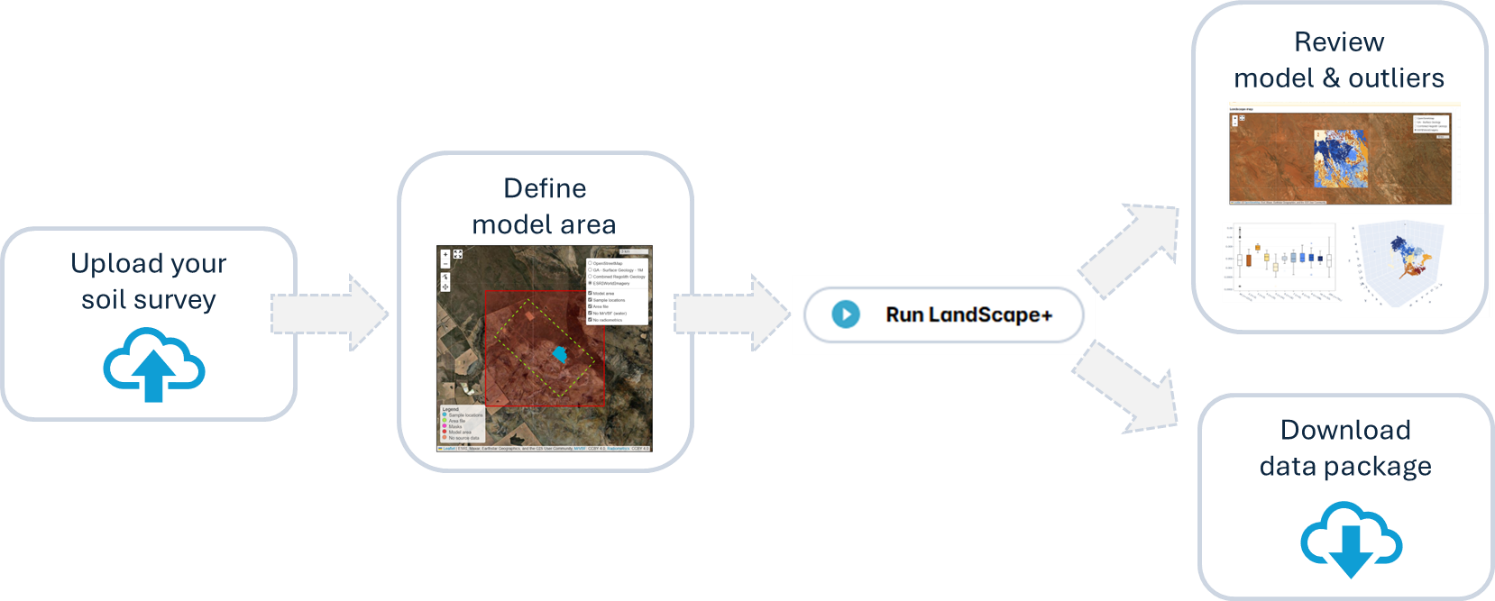
There are four main steps:
-
Upload your samples
-
Define your model area
-
Run a landscape model
-
Review and download your results
User Interface – Main features
The interactive User Interface is designed to guide users through the LandScape+ workflow. The following are the main features you will encounter on every page.
Task stepper
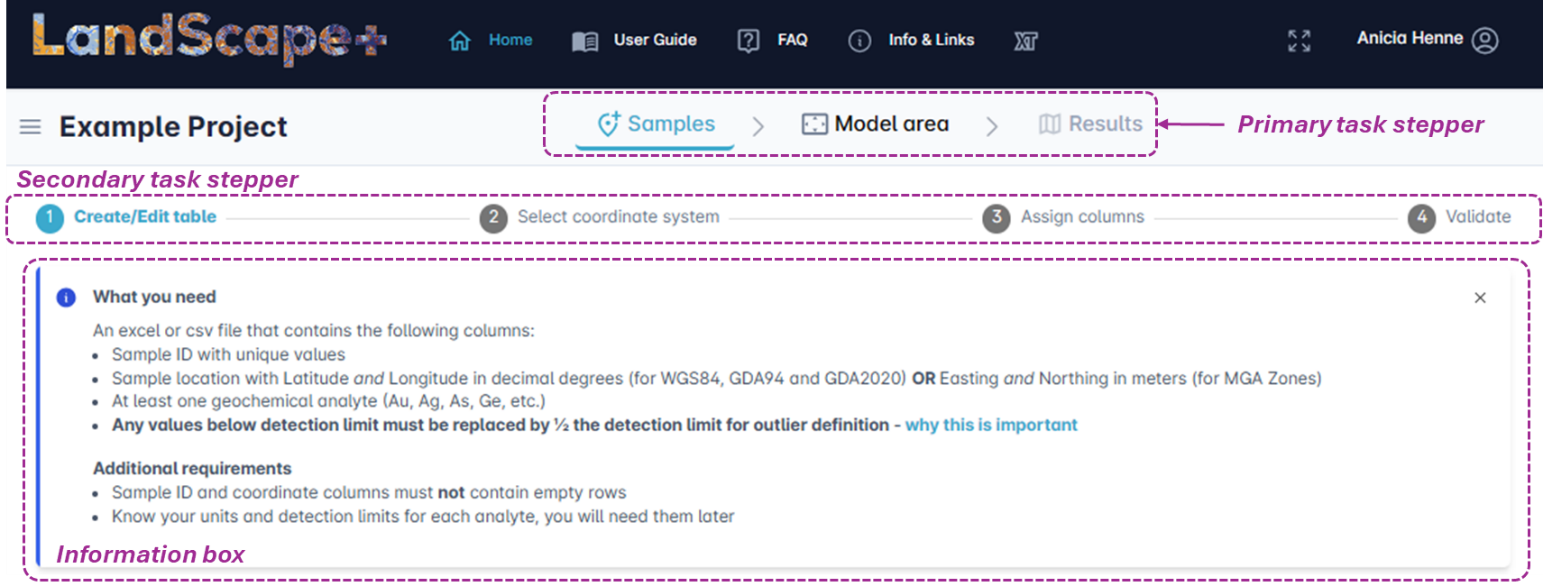
Task steppers at the top of each page will prompt you to follow the process for a first-time user. Task steppers are located at the top of each page with two tiers (primary and secondary). The Primary task stepper at the top contains the major workflow steps (Sample upload, Model area configuration and reviewing Results). The Secondary task stepper (bottom) guides you through each task in detail. You can skip steps in the Secondary task stepper once you are familiar with the software.
You can return to the previous steps at any time until you run the model. Your settings will only be locked in once you hit “Run LandScape+” AND confirm the warning message that will pop up. Once the model has run and you are in the Results interface, the Secondary task steppers are cumulative, so any option from a previous step will still be available to you.
If, after review of your results, you wish to make minor adjustments to your model area, you can return through the Primary task stepper to adjust your settings. You can run the model up to a maximum of three times.
Continue button
Once you have completed each necessary step the Continue button will turn from grey to blue.
CSIRO blue indicates the next step

Information box
Information boxes provide help text. They appear by default and can be minimised by clicking on the grey cross. Click on Information icons to access additional help text.
Click on the Information icon to view help text
Minimise by clicking the cross
Screen scale and layout settings
The recommended display settings (scale and layout) for the LandScape+ user interface is 100 to 125 %. If your screen scale and layout is set higher, you may have to scroll down to access all page content. To change this on your PC go to Settings → System → Display → Scale and layout, or, if you are logged into LandScape+ in your browser, hit Ctrl +/-.
Progress interruption
The software saves you progress when you click on Action buttons (e.g., the Continue button). – If you (or your internet connection) get interrupted it will pick up near where you left next time you log in.